Original SafeWise safety & security research featured in:
Eufy Floodlight Cam 2 Pro Review
For over 11 years, SafeWise experts have conducted independent research and testing to create unbiased, human reviews. Learn how we test and review.
The Eufy Floodlight Cam 2 Pro is one of our favorite floodlight security cameras. Thanks to powerful floodlights with unique customization options, it stands apart from the competition. We're also big fans of the sharp 2K resolution, which creates stunning videos day and night.
But you shouldn't expect a huge video storage capacity since you can't expand the built-in memory or use this cam with Eufy's cloud storage plans. It's also one of the most expensive floodlight cameras on the market. Read our full review to find out why we recommend the Eufy Floodlight Cam 2 Pro.
In our Eufy Floodlight Cam 2 Pro Review
Eufy Floodlight Cam 2 Pro: Floodlight features
Intense brightness
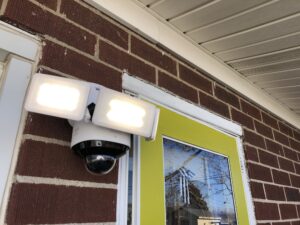
The Eufy Floodlight Cam 2 Pro has some of the brightest floodlights in this security camera category. Eufy's three-panel setup produces up to 3,000 lumens, which is enough to light a significant portion of our tester's backyard and patio.
At this brightness, it's easy to dazzle anyone looking directly at the camera, so we needed to look at the ground when approaching the floodlights from a distance.
This means an intruder will have trouble walking toward your home quickly, so they may turn tail for a hasty retreat. (Plus, Eufy's motion-activated floodlights make it hard to know if someone's watching when the lights come on.)
Adjustable floodlight panels
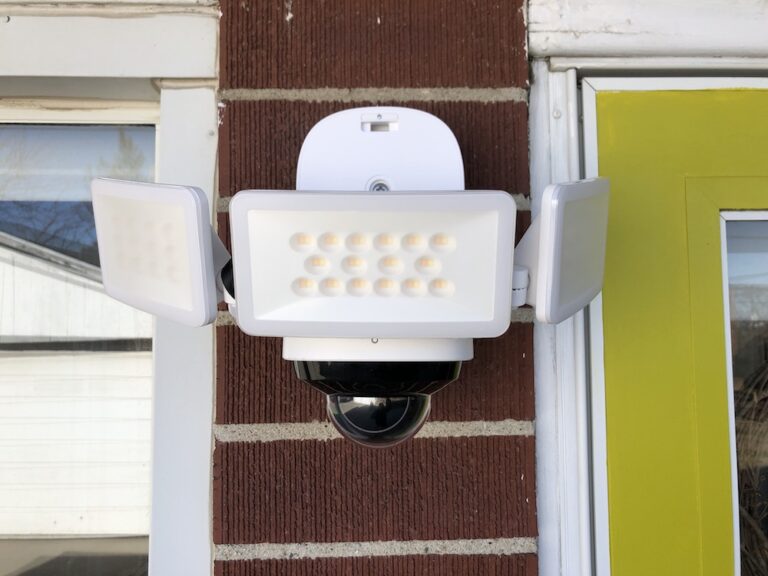
Photo credit: SafeWise
We love the design of the three LED panels, which are equal parts sleek and elegant. Plus, they're adjustable, so you can point them where you need extra light in your yard. The two side panels attach to the center panel and pivot about 90° to point to the side instead of the front. The center panel keeps everything tidy and tilts the whole lighting setup downward as needed.
This flexibility was essential for making sure the floodlight camera fit next to a busy doorway. We tucked in the panel closest to the door to keep it away from the swinging door.
Custom light color temperature
The Eufy Floodlight Cam 2 Pro's light panels have one more trick: you can tune the white light to fit different needs and moods. The white color temperatures range from a warmer soft white (3,000 K) to cooler daylight (5,700 K). When we evaluated other popular floodlight cameras, we didn't find any other products with this feature.
Eufy even gives you the option to assign different colors to different lighting modes and schedules. This is great for using a warm white when the light's in standby or harsher cool white when the camera's using motion detection instead. While we used cooler temperatures during most of our testing, we appreciate the option for warm light in case we throw a barbecue for some friends during the summer.
Eufy Floodlight Cam 2 Pro: Camera features
Excellent 2K video quality
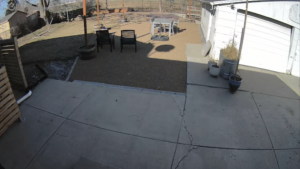
Aside from the impressive floodlights, Eufy's video quality is some of the best among security cameras. The Eufy Floodlight Cam 2 Pro can record video at resolutions up to 1920p (2K). This gives live video and recordings a crisp quality overall. Like most security cameras, there's a slight delay when watching live video. But you can usually reduce this with a stronger Wi-Fi signal or faster internet connection.
In our tests, it was easy to identify facial features and clothing details near and far from the camera. While there's more detail in daytime videos, the nighttime performance is almost as good, showing tons of color and sharpness as far as the floodlights could reach.
There's also infrared night vision that can bring more details in nighttime videos, but we rarely used it because the floodlight is so effective on its own. Still, we like that it's available if you want to use something less jarring (especially if the camera's outside your bedroom window) while you're asleep.
Eufy app and motion alerts
The Eufy Security app is your gateway to controlling your outdoor camera and floodlights. It worked well in our tests with a clean user interface that made it easy to find video recordings and change camera settings.
It also sends you motion alerts when the camera spots something in your yard. Eufy's smart motion detection has fewer features than brands like Google Nest, but it’s effective overall. The built-in human detection works as advertised, mostly, but it occasionally said passing cats were humans, so it's not foolproof. Eufy also includes security camera staples like simple motion detection and motion zones.
You can link the 100-decibel siren to motion detection in the Eufy Floodlight Cam 2 Pro if you want to startle someone out of your yard. It was loud enough to make us jump during testing—the cat wasn't amused either—and we could hear it throughout the entire house without any issues.
Pan-tilt functionality
Another unique feature of the Eufy Floodlight Cam 2 Pro is its pan-tilt motors. These make it so you can point the lens anywhere in a 360º arc around the camera. This helps the 130º field of view on the camera's lens outperform wide-angle contenders like Arlo and Swann. Most other floodlight cameras rely on a fixed lens that you can't adjust outside of climbing a ladder to tweak it by hand.
The pan-tilt settings also work in tandem with the 270º motion sensor to track someone moving through your yard, increasing the odds of getting a clear view of their face and other identifying traits. The motion tracking works any time of day, making it a great tool for capturing better Eufy video footage.
Local video storage
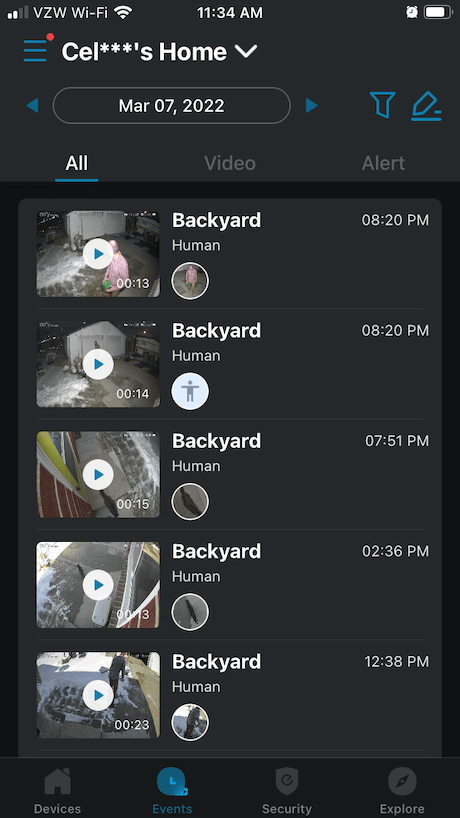
Screenshot credit: SafeWise
The Eufy Floodlight Cam 2 Pro stores all your video recordings locally on 8 GB of internal storage. We used only a fraction of this capacity during our testing. But Eufy estimates it's enough for about 30 days of storage (based on 45 recordings per day that are 30 seconds each).
This is more than enough space for most folks, and we like that the local storage is less intrusive on your privacy than cloud storage. Still, a small part of us wishes the camera's internal storage was expandable with a microSD card. Some of us forget to save important clips to our phones before the camera automatically deletes them to make space for new ones.
Although Eufy has a cloud storage plan, it doesn't apply to all its camera models, including the Eufy Floodlight Cam 2 Pro. It's nice that you don't need to pay a monthly fee for this option, but being able to store video in the cloud is always a bonus in our book.
Eufy smart home compatibility
All Eufy security cameras work with the Amazon Alexa and Google Assistant smart home ecosystems. This means you can ask for your camera's live view on a smart display like the Amazon Echo. It's convenient for seeing if the neighbor's kid left their bike on your lawn—again—but the Eufy app offers more features.
While some Eufy cameras support Apple HomeKit, the Floodlight Cam 2 Pro isn't one of them.
How Eufy compares to other top floodlight cameras
Amazon.com price as of post date. Read full disclaimer.
Installing the Eufy Floodlight Cam 2 Pro
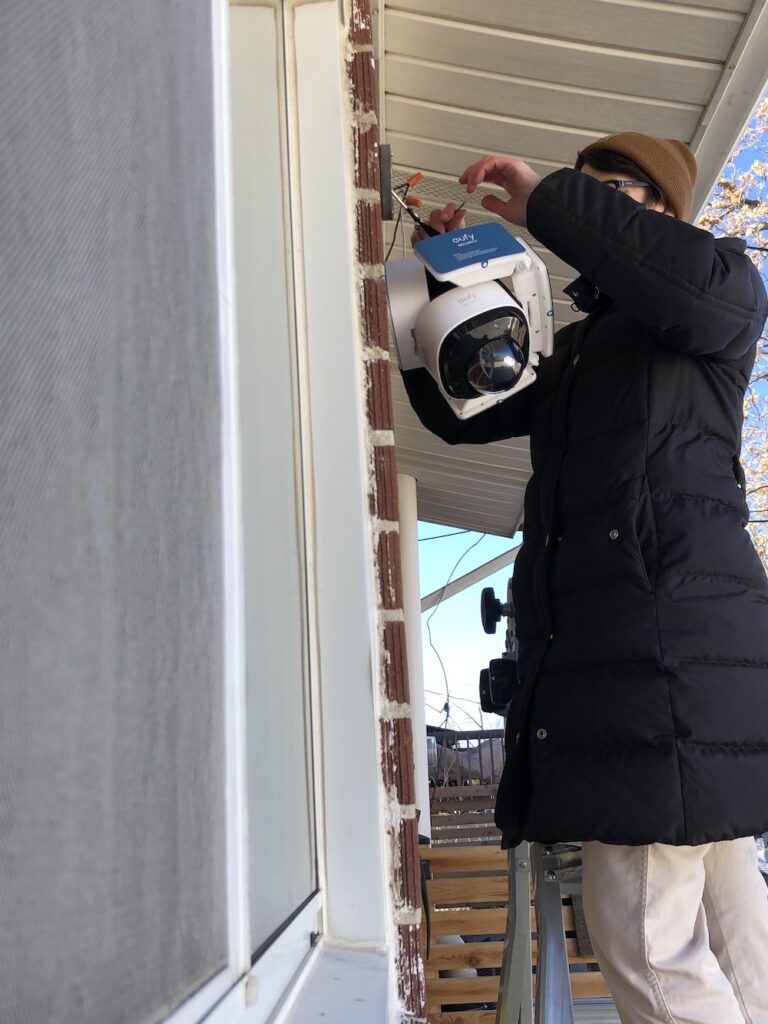
Setup
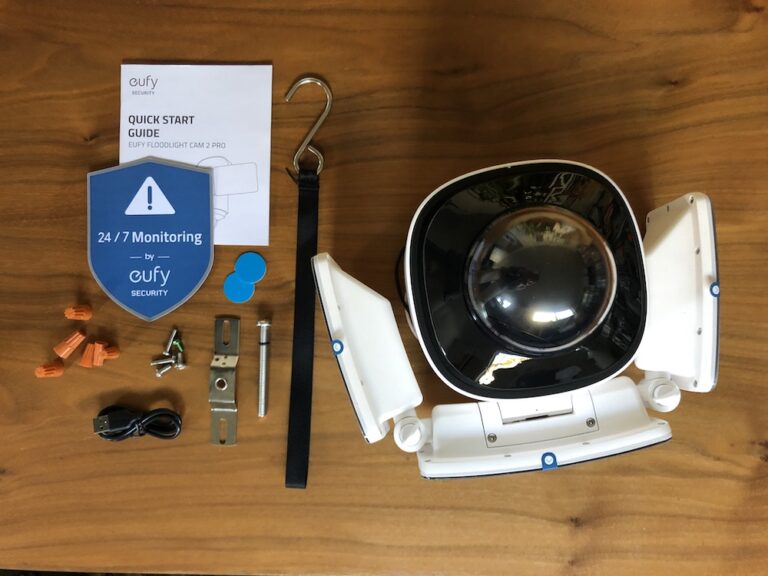
We spent about 15 minutes on setup: reading through the instructions, connecting the camera to the Eufy app, and updating the firmware. Eufy even includes a few small touches that make setup and installation more convenient—like a physical user manual and a USB cable.
A lot of brands keep their instructions in a mobile app, but a printed manual is easier to reference. We love that Eufy includes a USB cable to power the camera during setup so you don't need to do any wiring until you know the camera works with your Wi-Fi network. There's no USB adapter in the box; Eufy's betting on you using one you already have.
Installation
After completing the setup, it took about half an hour to install the security floodlight camera on the wall. (You can also mount it on a ceiling if that's where your junction box is.) While Eufy includes most of the required hardware in the box, you'll need a seperate ladder and a Phillips-head screwdriver.
Here's a quick rundown of the installation steps:
- Turn off the circuit breaker and remove the old light.
- Install the mounting plate to hold your Eufy floodlight camera in place.
- Hang your floodlight cam from the junction box using the included hook and strap. The camera is pretty heavy, so you need the strap to keep it in place while connecting the wiring.
- Use Eufy's wiring diagrams and the included wire nuts to wire everything into the circuit.
- While holding the camera, remove the hook and strap.
- Push the wiring into your junction box and attach the camera's base to the mounting plate using the included screws.
- Turn on the power to your Eufy camera.
a. If the camera doesn't turn on, you'll need to turn off the power and check the wiring.
8. Adjust the light panels where you want them and remove their protective film.
While installation is an easy process overall, it's still an intermediate DIY project because you're on a ladder and working with electrical wiring. Consider hiring an electrician or installation service if you're uncomfortable with the required tasks.
Eufy offers a ton of customer resources, including tutorials and an online user forum that’s great for fixing problems. You can also contact the company directly via email, phone, and live chat. The one-year warranty isn't very long compared to brands like Reolink and Google Nest but is long enough to discover most factory defects.
How Many Security Cameras Do You Really Need?
Subscribe to our YouTube channel and learn how to protect your home, loved ones, and belongings.
Final word
The Eufy Floodlight Cam 2 Pro takes a unique approach to floodlight cameras. Instead of slapping some bright lights on a security camera, Eufy goes all in on making a fantastic floodlight you can customize to your heart's content. And it's not just the floodlights—Eufy rounds out the whole package with a solid pan-tilt security camera boasting top-tier video quality.
We have some reservations around the $300 price tag, especially since you can't expand the local storage or add cloud video storage. Still, if you have the budget for a truly great floodlight camera, Eufy Floodlight Cam 2 Pro is a solid choice. Learn more about this brand in our Eufy cameras review.
If you're still exploring your options, check out our review of the best floodlight cameras to see how Eufy compares with rivals.
Eufy finally addressed a November 2022 security issue in an article from The Verge. The company explained why the Eufy web portal wasn't encrypting live video streams and stated the issue has since been fixed. It's also updating every Eufy camera's encryption protocols to further improve security.
Based on this response—and Eufy's commitment to more transparency and cooperation with independent security researchers—we're leaving our scoring as-is unless further issues arise.
FAQ
Is the Eufy floodlight camera hardwired?
You must wire the Eufy floodlight camera directly into an electrical junction box.
Can you replace the Eufy floodlight camera's lights?
The light panels on Eufy's floodlight cameras aren't replaceable, but the LEDs have a long lifespan—over 100,000 hours—and may ultimately outlast the camera hardware.
Will the Eufy floodlight work without Wi-Fi?
Eufy's floodlight cameras don't require a Wi-Fi connection to record video since they have built-in storage. But you still need a Wi-Fi connection to control the camera and view security footage.
How we reviewed the Eufy Floodlight Cam 2 Pro
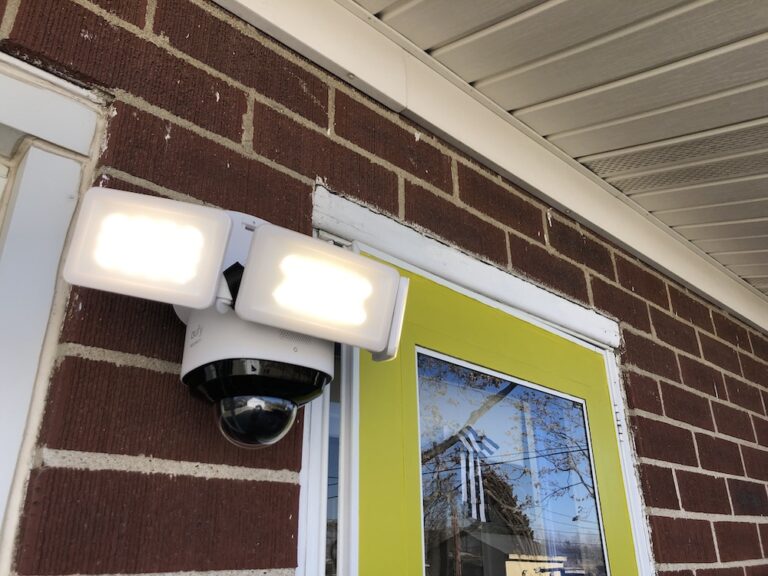
Photo credit: SafeWise
Eufy sent us a camera that we installed above a back patio, where we tested it for two months. This location helped us expose the security floodlight cam to various environmental conditions like winter weather, spring showers, and curious neighborhood cats.
We scored the camera in three categories:
- Floodlight performance
- Camera performance
- Installation and customer support
In addition to hands-on testing, we also evaluated Eufy's website, product specs, and customer reviews before settling on a final score and recommendation. Learn more about our product testing, ranking, and reviewing in our full methodology.
Related articles on SafeWise
Product prices and availability are accurate as of the date/time indicated and are subject to change. Any price and availability information displayed on Amazon at the time of purchase will apply to the purchase of this product. Safewise.com utilizes paid Amazon links.
Certain content that appears on this site comes from Amazon. This content is provided "as is" and is subject to change or removal at any time.
†Google, Google Nest, Google Assistant, and other related marks are trademarks of Google LLC.
Recent Articles
