How to change a car tire step by step
If you’re driving when you get a flat tire, slowly decrease your vehicle’s speed, turn your car’s hazard lights on, and look for a safe place to stop. If possible, pull into a parking lot with open space or find another low-traffic area.
Step 1: Set parking brake
Once stopped, put your car in park and engage the parking brake. This is another safety measure to help your car remain in place while you change the tire.
Step 2: Put out warning devices
If you have flares or reflective warning triangles, set them out according to product instructions. Use extreme caution and never turn your back to oncoming traffic.
Step 3: Place wheel wedges
Wheel wedges help prevent your car from moving. When changing a front tire, place them behind your car’s rear tires. When you change a rear tire, place them in front of the car’s front tires.
Next, you need to remove the hubcap. This is necessary so you can get to the lug nuts that secure your tire to the car. Use the pry bar (the lug wrench’s flat end) to pop the hubcap off the tire rim.
Use the lug wrench to loosen the lug nuts. Remember: lefty-loosey. You might need more leverage or an extra oomph of strength if the lug nuts are especially tight. Longer lug wrenches give more leverage, and sometimes you can push the lug wrench down with your foot to loosen the nut—just be careful not to loose your balance.
Step 6: Position jack under your car
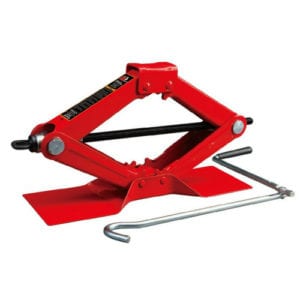
The best place for a jack is under the vehicle frame, next to the flat tire. For safety and to avoid damaging your car, consult your vehicle owners manual for specific instructions on where, and how, to place the jack.
Step 7: Lift vehicle using jack
Pump the jack slowly until the flat tire is off the ground. Make sure none of your or anyone else’s body parts go under the car while you’re raising it or once it’s raised. If your car moves while it’s on the jack, don’t try to stop it. Move away from your car and wait for it to fall, then try again.
Step 8: Completely unscrew lug nuts
With the lug nuts already loose, finish unscrewing them by hand. Put the lug nuts in a safe location so they aren’t misplaced.
Pull the tire toward you to remove it from the hub, then place it on its side and out of your way. If it's being stubborn, kick it. No, really—a swift kick can loosen any rust and help you pull the tire off. If you're wearing flip flops or sandals, sit on the ground (if it's safe to do so) and put both feet on the tire and push.
Step 10: Mount spare tire
Line up the spare tire with the lug bolts and push it on the wheel hub until the bolts penetrate the rim.
Step 11: Replace lug nuts
Place the lug nuts on the lug bolts and tighten them down by hand. Don’t use the lug wrench to secure them yet.
Step 12: Slightly lower vehicle
Using the jack, lower your car until the spare tire touches the ground. Be careful not to lower it to the point where it bears your vehicle’s whole weight.
Step 13: Tighten lug nuts with wrench
Tighten down the lug nuts by turning the wrench clockwise as much as you can. It’s important to tighten the lug nuts in the correct sequence to help ensure they stay secure on the hub. The star pattern is a good rule of thumb for tightening lug nuts.
Step 14: Finish lowering vehicle
Lower your car completely and remove the jack. Tighten your wheel’s lug nuts one more time, using the same pattern as you did in the previous step.
Step 15: Put hubcap back on
If the hubcap you removed fits the spare tire, put it back on.
Step 16: Check tire pressure
If the hubcap you removed fits the spare tire, put it back on.
Step 17: Return all equipment and supplies to your vehicle
Gather all the items you used and secure them in your car. Be sure to stow your owners manual, jack, and lug wrench in their proper places.
Step 18: Get your flat tire fixed
It’s dangerous to drive on a spare tire for long distances so take your flat tire to a professional auto repair shop and have it fixed or replaced as soon as possible.


