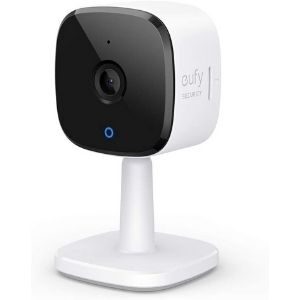
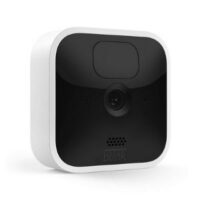
Installing security cameras in and around your home isn’t difficult. It takes only a few minutes and very basic tools. This guide will show you how to choose a security camera, where to put it, and how to install a security camera from start to finish.
How to Install Security Cameras
For over 11 years, SafeWise experts have conducted independent research and testing to write unbiased, human reviews (not robots). Learn more.
Sign up for our free weekly newsletter to get the best safety news, product info, and deals.
By signing up, you agree to our Terms and Conditions and Privacy Policy.
Camera etiquette
Remember, cameras are watching people, and some people may not like it. Before you install security cameras around your home, make sure you are up to date on security camera laws, rights, and etiquette:
- Make sure not to record your neighbors' property.
- Avoid recording in spaces that people expect privacy—like bedrooms or bathrooms.
- Have a conversation with people in your house about the cameras and make sure they’re comfortable.
- Check local laws for security camera restrictions, especially before posting a recording online.
Where to install home security cameras
Before you jump to security camera installation, whip up a strategic plan about where you’re going to place your cameras for video surveillance. Your front door is a great place for your first camera so it can capture potential porch pirates.
Here are other great security camera locations for your indoor camera and outdoor camera:
- By the back or side doors
- By the doors of your shed or garage
- Pointed towards your driveway
- In your entryway facing the door
- Near windows that aren’t visible from the street
- In the nursery as a nanny cam or baby monitor
How to install a security camera
You install most wireless security cameras the same way. The security camera installation takes around 15 to 20 minutes, depending on where you’re installing the camera. These steps will get you from start to finish in no time.
What tools or supplies will I need for security camera installation?
Many cameras come with almost everything you’ll need to get them installed, including screws. There are some other things you should round up:
- If you’re planning on attaching the camera to a wall, we recommend using a drill to make things easier.
- If you don’t have a drill, grab a screwdriver, finishing nail (or any tiny nail), and a hammer.
- You’ll also need a pencil.
Video: Install Any Security Camera with THESE 3 Steps
Subscribe to our YouTube channel and learn how to protect your home, loved ones, and belongings.
Step 1: Charge the camera
Note: If your camera has a power cord, you can skip this step.
Locate the charging cable, connect it to the battery pack, and plug it in. We know how tempting it is to jump right into installing a camera right out of the box, but don’t miss this step. You don’t want to fully install the camera and then take it right down to charge the battery.
Step 2: Download the app
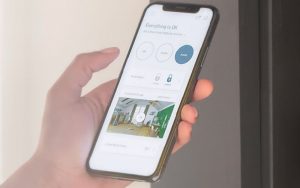
Download the app the camera uses to your phone. Some camera companies use different apps for different cameras in their lineup. Look for the quick start guide in the camera’s box. The guide should list the name of the right app.
Step 3: Connect the app to the camera
Once you have the app, you’ll need to connect the camera to the app so they can send information to each other.
Make sure your phone is connected to the same type of Wi-Fi network your camera uses. Most cameras work with a 2 GHz network. So if your phone is connected to your home’s 5 GHz network, the camera won’t connect to the app.
- Remove the camera from the charger or plug it into the wall if it has a power cord.
- Open the app and create an account using the onscreen instructions.
- Log in.
- Tap the option to add a camera or new device.
- When prompted, scan the QR code on the camera’s box with your phone or select the camera from the list on the screen.
- Choose your Wi-Fi network from the list on the screen.
- Follow the on-screen instructions to finish up.
Step 4: Mount your camera
If you plan on moving your camera frequently, you can place the camera on a table or shelf and, ta-da, it’s mounted. If you want a more permanent solution, you’ll need to mount your camera onto a wall or door frame.
- Locate the mounting bracket in the camera’s box.
- Place the bracket where you’ll want to place the camera, and use the pencil to make a dot where each screw will go.
- Make a pilot hole for the screws with a tiny drill bit. If you don’t have a drill, hammer the finishing nail into where each pencil mark dot is and then remove the nail. The small hole will make it easier for the screws to go in without cracking the wood. If you’re installing your camera on drywall, you’ll need to make the hole big enough to pop the drywall anchors (the plastic tubes packaged with the screws) inside. Use a drill bit or nail that is around the same size as the anchor to make the hole.
- Use the screws to secure the mounting bracket to the wall or doorframe.
- Attach the camera to the mounting bracket. Cameras usually twist onto the bracket.
Step 5: Set up storage
Now is the time to set up the storage system for your camera’s footage. Depending on the camera, there are several options:
- Set up a cloud account for the camera using the cloud option in the app.
- Connect the camera to its local storage devices such as a DVR, computer, or NVR using the wiring that came with the camera.
- Insert the SD or mini SD card into the memory slot on the camera.
Step 6: Customize your settings
We’ve finally made it to the fun part. Open the app again and start playing around with the features for the surveillance system. There are several common options that need to be customized:
- Motion sensitivity
- Spotlight brightness
- Activity zones
- Detection zones
- Camera brightness
- Push notifications
Step 7: Set up two-factor authentication
If you haven’t already, and if your app offers it, set up the two-factor authentication. This security feature will help protect your camera system from hackers and thieves by providing a second layer of security beyond just a password.
Looking for cameras?
Amazon.com price as of post date. Offers and availability may vary by location and are subject to change Read full disclaimer.
Home security cameras FAQ
Installing a Nest camera is simple and much like the directions above. We have a guide for installing Nest indoor and outdoor cameras you can follow.
Not always. You’ll need a wireless camera that is an IP camera. With these cameras, footage is stored locally without the internet.
We like Wyze cameras, but here are some more choices for under $50.
Recent Articles
